Algo Builder: Intro to the Web Package
This tutorial is to demonstrate pipeline-ui and AlgoSigner in webapp using @algo-builder/web. This is a React + pipeline-ui + WebMode project which serves as an app template.
 JavaScript
Requirements
- Node 16+
- Clone
pipeline-ui-template. - Yarn
v3.2+or NPMv8.0+or PNPMv6.21+. - Setup the accounts on
Algosignerwallet. It could be MainNet, TestNet. By default on template it isMainNet. algo-builder/web
Background
What is @algo-builder/web?
@algo-builder/web provides WebMode class which has variety of high level functions like, waitForConfirmation, executeTx, signTransaction, etc. These functions help sending transactions and building dapps.
Steps
1. Setup the pipeline-ui-template
Follow the README of this repository and setup the project.
2. Project running on localhost
When running the above web app you should be able to access it at localhost and you should be able to see below screen in Figure 2-1. By default, MainNet network is selected.

Figure 2-1 Number Increment App with MainNet selected.
3. Network type selection.
Click on the MainNet checkbox to choose switch to TestNet. Checked checkbox indicates MainNet is active else TestNet is active.
4. Connect AlgoSigner
Click on Algosigner button to connect to AlgoSigner wallet. This will connect only if you have setup the AlgoSigner wallet already. On successful connection, your wallet address should display below. It should look similar to below image in Figure 4-1.

Figure 4-1 AlgoSigner connected.
5. Deploy app
Click on Deploy button to deploy the application. This initializes the application. On successful app deployment, you should be able to see something like below in Figure 5-1.

Figure 5-1 Number Increment App deployed.
6. Application call
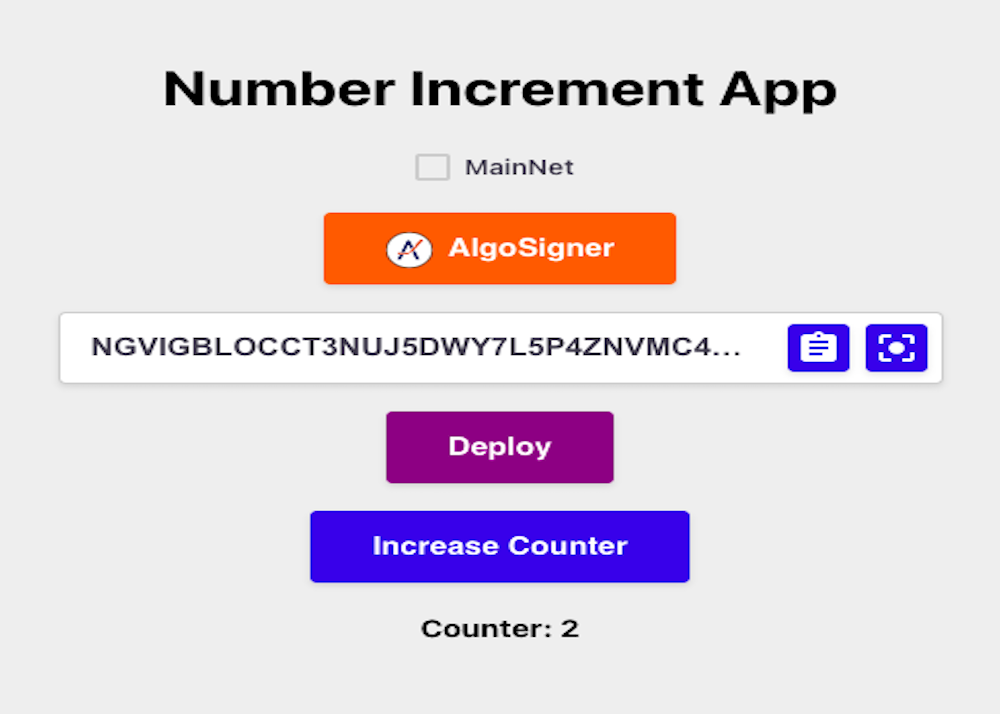
Click on Increase Counter button to call the application. Every successful application call increases the counter by one. You should be able to see something like below in Figure 6-1.

Figure 6-1 Number Increment App counter increased.
Below method is called on clicking the Increase Counter button. Here, we are creating the instance of WebMode and then calling it’s built-in executeTx to call the app.
appCall = () => {
        const networkType = Pipeline.main
            ? NetworkType.MAIN_NET
            : NetworkType.TEST_NET;
        const webMode: WebMode = new WebMode(AlgoSigner, networkType);
        const tx: types.ExecParams[] = [
            {
                type: types.TransactionType.CallApp,
                sign: types.SignType.SecretKey,
                fromAccount: {
                    addr: this.props.addr,
                    sk: new Uint8Array(0),
                },
                appID: this.props.appId,
                payFlags: {},
            },
        ];
        webMode.executeTx(tx);
    };
7. Summary
In this tutorial we learned how we can connect to Algosigner wallet in React app using pipeline-ui. We also explored WebMode instance to increase the counter by one value and it’s built-in method to execute transaction.