Algorand Studio | Tutorial 1: Basic Features
This is the first article of our Algorand Studio Tutorial series. We will introduce how to properly set up your local machine for Algorand development, and walk through the basic features of Algorand Studio. After the first tutorial, you will be able to
- Start an Algorand node on your local machine
- Create Algorand keypairs
- Claim test tokens using the faucet
- Make transfers between addresses
- Make general transactions such as atomic transfer

 JavaScript
Requirements
Steps
Install Algorand Studio and dependencies
You may download the latest build of Algorand Studio from the Github repo. Algorand Studio currently supports macOS and Linux operating systems while we’re working hard to extend it to other platforms.
Download, install and run Algorand Studio on your device. If everything works as it should be, you will be brought to a welcome screen where you shall see a checklist of prerequisites for Algorand Studio. It requires Docker runtime, Algorand Node and PyTeal Compiler to properly function. Click the button at the end of each line to complete the installation as per instruction.

When all the three tools are installed, click the Get Started button and enter Algorand Studio.
Start Algorand node and connect to the testnet
Click the Network button in the header and switch to the network manager. Then click the New Instance button in the upper right corner to create a new Algorand node instance. Algorand Studio will automatically download the latest snapshot to save time for synchronizing data with the network.

When the snapshot is fully downloaded, an Algorand node instance will show up in the instance list. Click Start to start the Algorand node. Notice that Algorand Studio only supports the testnet at this moment.
Create Algorand keypairs
We also need to create some keypairs for the following tasks such as making transfers and execute a smart contract.
Click the key icon on the bottom left corner of Algorand Studio to open the Keypair Manager, then click Create button. A popup window will guide you through the process. Put in the name of the keypair, click the Save button and you will see the new address you just created.
A keypair is composed of a public key and a private key. Private keys in Algorand Studio are stored in the form of mnemonic. You may export mnemonic phrases by clicking the eye icon at the end of each address, while a popup window will show the address and associated mnemonic.

In this tutorial series, you need to create three keypairs with names Alice, Bob and Charlie. We will use their names to reference the three keypairs in this and also the following tutorials.
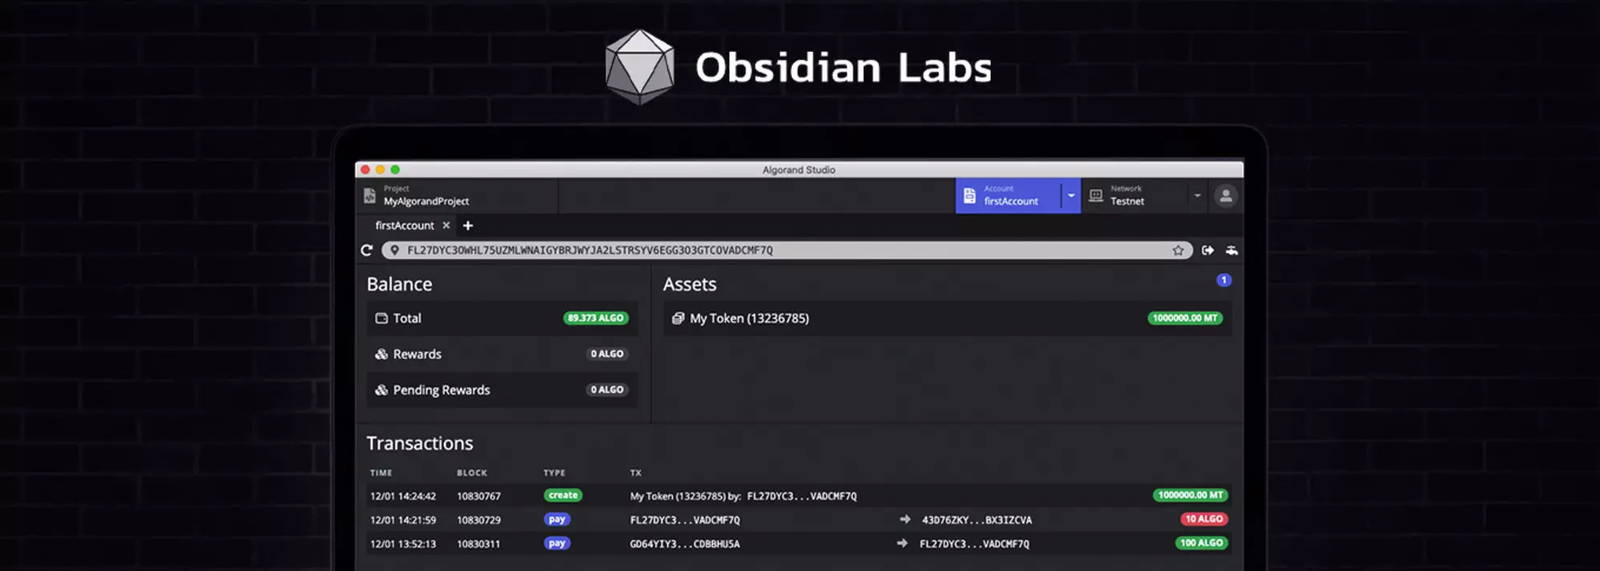
View using the explorer
Click the Account button in the header to open the Account Explorer and paste Alice’s address in the address input. You should see Alice’s ALGO balance on the left and every transactions on the bottom relating to her address.

Different from the screenshot, you may see an empty transaction list since you just created the account. Keep going in this tutorial and you will find how the two transactions come up.
Fund account from faucet
In the world of blockchain, people usually refer the tool for claiming test tokens as faucet. Click the faucet button next to the address input and the window for Algorand Dispenser will pop up. Enter Alice’s address and wait some time for the network to process the transaction. Later, you will see her balance goes up by 100 ALGO where a new transfer transaction is recorded in the transaction list.

Sending transactions
To start a transfer, open a new tab and type in Bob’s address into the address input. Press ENTER and you’ll see Bob’s current account balance which is 0 ALGO.
Switch back to Alice’s tab and press the Transfer button next to the address input. Type in 20 as the amount to transfer and the recipient’s address, which in our case the address of Bob. Click Sign and Push to initiate the transaction.
![]()
Refresh both Alice and Bob’s pages after transaction completes and you will see their balances updated to around 80 ALGO for Alice and 20 ALGO for Bob. The discrepency for Alice is because the transaction fee was deducted from her account as she is the sender of the transaction.
Construct transaction
Before going further, let’s talk about how to construct a general transaction. Algorand Studio defines transactions through JSON files. To use this feature we need to first create a project.
New project from template
Switch to Project in the header to open the project list page. Click the New button, put in a project name and select a template you wish to use for the new project. Let’s pick Dynamic Fee here. Then press Create Project to complete this process.

Algorand Studio will automatically open the newly created prroject. We will talk about the project structure in the next tutorial. Here let’s focus on the test folder where we can find some example transactions, each reflecting a specific type.

Transfer (pay)
Open 1.pay.json, you shall see all necessary information that defines a basic transfer transaction. It includes information such as the type (pay), the sender (from), the recipient (to), transaction amount, the signer alongside others. Here we defined a transfer of 10 ALGO from Alice to Bob and the transaction is digitally signed by Alice. Notice that you can use names stored in the Keypair Manager for addresses as they will be subsititued by Algorand Studio before the final execution.
Click the test-tube button in the toolbar (at the top of the file tree) and choose 1.pay.json in the popup window. Then click Run Test Transaction and wait for the transaction to complete.

Then switch to the Explorer and refresh Alice and Bob’s pages, we will see there are another 10 ALGO transfered between them and a new transaction record showed in the transaction list.
Atomic transfer
Atomic transfer makes sure multiple operations either all succeed or all fail. Open 2.atomic_transfer.json to see an example. The whole transaction object consists a txns array field where you can give multiple transaction parts. Different parts can have diverse transaction types, contents, and signers. In the example given we constructed an atomic transfer that made sure Alice sends Bob 1 ALGO at the same time Bob sends Charlie 1 ALGO. This structure is crucial when we contruct a transaction to use the Dynamic Fee smart contract.
For more information about atomic transfer, please refer the official docs.
Multisig
You can also construct multisig transactions in Algorand Studio. See 3.multisig.json for example and refer to the docs for more information.
Others
Algorand Studio will use the same structure to construct transactions for smart contracts. We will talk about this in the next tutorial. There are also other types of transactions which we left for the third tutorial.
Next Steps
In the next tutorial, we will introduce how to develop a smart contract on Algorand using the Dynamic Fee example.