
Create your Own Coin on TestNet (LaylaCoin Series)
Learn how to create an asset (called LaylaCoin). Opt-in to the created asset, transfer the asset, and read the balance of accounts that hold the asset.
Updated:
2021-06-15: Changed asset name/title.
2021-06-10: Migrated to V2 Python SDK.

 Python
Requirements
- py-algorand-sdk - (tested on v1.5.0)
- TestNet node address and token
Background
The code and data for this tutorial can be found here. The linked directory contains the following:
main.py: contains the main functions to create, opt-in, and send the asset.config.py: This will contain all of our configurable parameters. This is the file you will need to update as you run through this tutorial.util.py- various utility functions.LaylaGyoza.jpg- This is an image of Layla the puppy that we will reference when we create our coin.
You can download these files and follow along or generate them from scratch. If you download the files, you still need to actively modify config.py throughout the tutorial.
Let’s get started!
Steps
1. Generate the LaylaCoin Creator and Receiver Accounts
Since we will need several accounts, create a function that prints out a new address and private key and place it in the util.py module.
util.py
from algosdk import account, mnemonic

def generate_new_account():
    """
    Generate a new Algorand account and print the public address
    and private key mnemonic.
    """
    private_key, public_address = account.generate_account()
    passphrase = mnemonic.from_private_key(private_key)
    print("Address: {}\nPassphrase: \"{}\"".format(public_address, passphrase))
Call the function twice to print out a new address and passphrase for the creator and the eventual receiver of the asset.
>>> from util import generate_new_account
>>> generate_new_account()
Address: BE5Z4G4LFV56HALV3RG2O3H3TT5DGAKIEX42QVQAI4674IZCXRBE3F7DEE
Passphrase: "cluster aerobic arrest kit steak step deny firm average cycle visual entire guilt census april silly news beauty guess story dad mixture bracket able ecology"
>>> generate_new_account()
Address: GYOVUXBMA5C55BI4YO27WKI4QQIMXJHVXMMCFKEOJMZV6TRJJDJ6V6NTAU
Passphrase: "leopard welcome glue aspect coyote foot expect jar relax doctor giraffe tube doctor urge absorb human delay host brass step lumber grid one able scale"
In config.py add the address and passphrase you just generated as values to the creator_address and creator_passphrase variables and then the receiver_address and receiver_passphrase, respectively.
config.py
creator_address = "BE5Z4G4LFV56HALV3RG2O3H3TT5DGAKIEX42QVQAI4674IZCXRBE3F7DEE"
creator_passphrase = "cluster aerobic arrest kit steak step deny firm average cycle visual entire guilt census april silly news beauty guess story dad mixture bracket able ecology"

receiver_address = "GYOVUXBMA5C55BI4YO27WKI4QQIMXJHVXMMCFKEOJMZV6TRJJDJ6V6NTAU"
receiver_passphrase = "leopard welcome glue aspect coyote foot expect jar relax doctor giraffe tube doctor urge absorb human delay host brass step lumber grid one able scale"
Remember that the passphrase is your secret key, and in practice, you should never show this to anyone (or store it in a file on an online device as we are doing here). The keys above are considered compromised since now anyone can take them and use them to sign transactions from these accounts. Make sure to generate your own accounts above and store the passphrases securely.
Fund the accounts on TestNet by pasting the addresses into the text box on the TestNet faucet page. Make sure you get a 200 response before proceeding.
Info
You need a minimum balance of 100,000 microAlgos for each asset you create on Algorand.
Learn More
- Overview of Accounts on Algorand
- Creating a Standalone Account
2. Define the LaylaCoin Parameters
Next, specify the parameters that will define the asset.

Layla the Dog
Our asset is going to represent Layla the dog (see above), so we will call it "LaylaCoin", naturally.
Let’s name one unit of LaylaCoin a "Woof". We’ll use the creator_address we defined in step 1 as the manager, reserve manager, freeze manager, and clawback manager for simplicity, which means that the creator address can also reconfigure the asset, freeze specific accounts from trading the asset, and revoke assets from accounts.
In other words, you do need to trust that Layla (or her managers) will not freeze or revoke your assets for no reason. If you don’t trust Layla and/or her entourage, you might not want to trade her coin, and instead you might look for a coin managed by an entity that you trust or by an entity that has relinquished its rights to freeze or clawback the asset (i.e. has set those fields to null). But, come on, who wouldn’t trust that face?! 🐶
Let’s translate the specs we have so far for LaylaCoin into asset parameter values. We will create a dictionary called asset_details in our config.py, and assign the following values that we know of right now.
config.py
# Details of the asset creation transaction
asset_details = {
    "asset_name": "LaylaCoin",
    "unit_name": "Woof",
    "manager": creator_address,
    "reserve": creator_address,
    "freeze": creator_address,
    "clawback": creator_address,
    ...
}
We still need to specify the total number of base units of LaylaCoin and their divisibility unit. We will specify 888888888 total base units of LaylaCoin, and set the decimal value to 2, meaning that there are 8888888.88 Woof to be minted in total. Let’s go ahead and set the "default_frozen" state to False, which just means that holders of the asset can trade it freely and do not need to be whitelisted by the freeze manager.
    ...
    "total": 888888888,
    "decimals":2,
    "default_frozen": False,
    ...
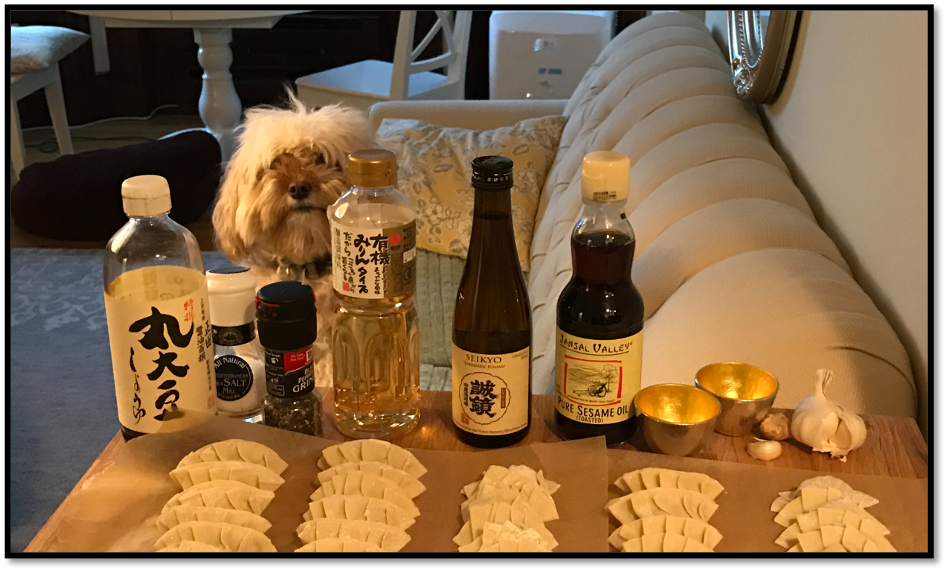
Layla Preparing Gyoza (link to full size image)
At this point, we have enough parameters specified to create the asset. However, we are going to add a few more optional parameters. Let’s make the image of Layla preparing gyoza (Japanese-style dumplings) a first order detail for the asset by setting the name of image as the asset_url and the hash of the image as the "metadata_hash" variable.
To hash the image, add a function to util.py that takes a file, reads in the bytes, and outputs the hash using a SHA256 hash function. We will make sure the function can return the hash as raw bytes or as a base64-encoded string. The asset_details will take the byte version, but the base64 encoded version is often shown elsewhere (like when you run goal clerk inspect on a transaction) so its nice to have available.
util.py
import hashlib

def hash_file_data(filename, return_type="bytes"):
    """
    Takes any byte data and returns the SHA256 hash in base64.
    """
    filebytes = open(filename, 'rb').read()
    h = hashlib.sha256()
    h.update(filebytes)
    if return_type == "bytes":
        return h.digest()
    elif return_type == "base64":
        return base64.b64encode(h.digest())
Call this function with LaylaGyoza.jpg and output both the hash bytes and base64 encoding.
>>> from util import hash_file_data
>>> hash_file_data('LaylaGyoza.jpg')
b'O\x88\xfd\xf2\xd1\xfe\xee\x96+\xf9\xf0\xb6\xb2\x8d\r\xb5\xced)#\x9bV\xce\xa4\x81\xa6\xb9\xbd\x0e\xf7al'
>>> hash_file_data('LaylaGyoza.jpg', 'base64')
b'T4j98tH+7pYr+fC2so0Ntc5kKSObVs6kgaa5vQ73YWw='
>>>
Info
Unlike the accounts you created earlier, the output of this function on the provided image should match exactly and never change. This proves that we are referencing the same committed data.
Assign the byte output to the metadata_hash variable in the asset_details dict and the filename to the "url" variable, both found in config.py.
config.py
    ...
    "url": "LaylaGyoza.jpg",
    "metadata_hash": b'O\x88\xfd\xf2\xd1\xfe\xee\x96+\xf9\xf0\xb6\xb2\x8d\r\xb5\xced)#\x9bV\xce\xa4\x81\xa6\xb9\xbd\x0e\xf7al'
}
To keep record, store the image filename and the base64 version of the image hash as their own variables in config.py.
metadata_file = "LaylaGyoza.jpg"
metadatahash_b64 = "T4j98tH+7pYr+fC2so0Ntc5kKSObVs6kgaa5vQ73YWw="
At this point all our asset parameters are specified and we can move on to constructing the asset creation transaction.
Learn More
- Asset Parameters
3. Create LaylaCoin
The asset_details data we created so far are a subset of the transaction data we need to create the asset. Let’s add the remaining transaction data to asset_details so we can use it to create a valid transaction.
Some of these extra parameters rely on some network state (like current round) so we will need an algod client connected to a TestNet node. Open config.py and enter values for your algod_address and algod_token for TestNet.
In the main.py file import all config variables, the algod module, the AssetConfigTxn transaction class and the write_to_file function.
from config import *
from algosdk.v2client import algod
from algosdk.future.transaction import AssetConfigTxn
from algosdk.future.transaction import write_to_file
Instantiate an algod client with the address and token you imported from your config.py file.
main.py
client = algod.AlgodClient(algod_token, algod_address)
Create a function in main.py file called create, which will create an asset using the asset_details from config.py. For now, just document what it will do. This function will add any remaining transaction parameters to the provided asset_details and create the transaction object. If the transaction sender’s passphrase is supplied, it will sign and send the transaction immediately. Otherwise, it will write the unsigned transaction to a file for offline signing.
main.py
def create(passphrase=None):
    """
    Creates the asset defined in `config.py`, signs it, and sends it to the network if the sender passphrase is supplied. Otherwise, it writes the unsigned transaction to a file.
    """
    ...
Let’s add a few helper functions to util.py that will help us with sending any transaction. Create a sign_and_send function, which takes a transaction object, a passphrase, and algod client. It signs the transaction, sends it to the network, and returns the transaction info once the transaction is confirmed. This function utilizes the wait_for_confirmation function which checks for when the transaction is confirmed by the network and only then returns the transaction info. Both functions are defined below.
util.py
from algosdk import mnemonic

def wait_for_confirmation(client, transaction_id, timeout):
    """
    https://developer.algorand.org/docs/build-apps/hello_world/#wait-for-confirmation
    Wait until the transaction is confirmed or rejected, or until 'timeout'
    number of rounds have passed.
    Args:
        transaction_id (str): the transaction to wait for
        timeout (int): maximum number of rounds to wait
    Returns:
        dict: pending transaction information, or throws an error if the transaction
            is not confirmed or rejected in the next timeout rounds
    """
    start_round = client.status()["last-round"] + 1;
    current_round = start_round

    while current_round < start_round + timeout:
        try:
            pending_txn = client.pending_transaction_info(transaction_id)
        except Exception:
            return
        if pending_txn.get("confirmed-round", 0) > 0:
            return pending_txn
        elif pending_txn["pool-error"]:
            raise Exception(
                'pool error: {}'.format(pending_txn["pool-error"]))
        client.status_after_block(current_round)
        current_round += 1
    raise Exception(
        'pending tx not found in timeout rounds, timeout value = : {}'.format(timeout))

def sign_and_send(txn, passphrase, client):
    """
    Signs and sends the transaction to the network.
    Returns transaction info.
    """
    private_key = mnemonic.to_private_key(passphrase)
    stxn = txn.sign(private_key)
    txid = stxn.transaction.get_txid()
    client.send_transaction(stxn)
    wait_for_confirmation(client, txid, 5)
    print('Confirmed TXID: {}'.format(txid))
    txinfo = client.pending_transaction_info(txid)
    return txinfo
In main.py, import the sign_and_send function we just created and fill in the rest of the create function that utilizes it.
main.py
from util import sign_and_send

def create(passphrase=None):
    """
    Returns an unsigned txn object and writes the unsigned transaction
    object to a file for offline signing. Uses current network params.
    """

    params = client.suggested_params()
    txn = AssetConfigTxn(creator_address, params, **asset_details)

    if passphrase:
        txinfo = sign_and_send(txn, passphrase, client)
        asset_id = txinfo.get('asset-index')
        print("Asset ID: {}".format(asset_id))
    else:
        write_to_file([txn], "create_coin.txn")
Call this function from the REPL and supply the passphrase of the creator account.
>>> from main import create
>>> from config import creator_passphrase
>>> create(creator_passphrase)
Confirmed TXID: 6MIKHNNVNWIWYVLDVBAV262B7DQWFT6FJSEBBZV5P3T6F33EHBDA
Asset ID: 219501
The function prints the asset ID for the created asset. This is the unique identifier for LaylaCoin. Let’s store this in our config.py file as the asset_id so we can use it in later transactions related to the asset.
util.py
# The asset ID is available after the asset is created.
asset_id = 219501
It’s official! LaylaCoin now exists on the Algorand TestNet!
Learn More
- Obtain an algod address and token
- Create an asset
- Anatomy of an asset creation transaction
4. Opt-In to Receive LaylaCoin
Now that LaylaCoin exists, others can opt-in to receive the asset. Take the receiver account you created in step 1 and have it opt-in to LaylaCoin. To do this, add a new function in main.py called optin.
Just like the create function, optin takes an optional passphrase argument. If supplied, it will sign and send an optin transaction for LaylaCoin, otherwise it will write the unsigned transaction to a file. An opt-in transaction is a form of an asset transfer transaction where the "sender" and "receiver" are the same (i.e. the account opting in) and the amount of asset transferred is 0. This data is captured in optin_data in the function defined below. Note that we import the AssetTransferTxn class which will help us construct the right type of transaction.
main.py
from algosdk.future.transaction import AssetTransferTxn

def optin(passphrase=None):
    """
    Creates an unsigned opt-in transaction for the specified asset id and
    address. Uses current network params.
    """
    params = client.suggested_params()
    txn = AssetTransferTxn(sender=receiver_address, sp=params, receiver=receiver_address, amt=0, index=asset_id)
    if passphrase:
        txinfo = sign_and_send(txn, passphrase, client)
        print("Opted in to asset ID: {}".format(asset_id))
    else:
        write_to_file([txns], "optin.txn")
Call this function on the REPL using the receiver_passphrase, i.e. the sender.
>>> from main import optin
>>> from config import receiver_passphrase
>>> optin(receiver_passphrase)
Confirmed TXID: 6XRAUSUJ6YEN254BT4VRO3OBSDCNSZOBJ4U42AIWTL6KFFMCNJJA
Opted in to asset ID: 219501
Learn More
- Opting in to Assets
- Anatomy of an Opt-in Transaction
5. Read the LaylaCoin Balance
At this point, there are two accounts opted in to receive LaylaCoin, the creator (opted in by default) and the receiver account. Before transferring LaylaCoins let’s add some functions to help us check an account’s asset balance for a specific asset id and, as part of that, cleanly format the asset balance once retrieved.
First, add the formatter function in util.py. Remember how we specified a "decimal" value and a "unit_name" for LaylaCoin on asset creation? We want to make sure that this displays correctly for our coin and for any other asset on Algorand for that matter.
The formatter function, call it balance_formatter, takes an asset amount, the id of the asset, and an algod client as input, extracts the configuration details of the asset from the network and returns the amount of the asset, formatted with the correct decimals, and suffixed by the unitname.
util.py
def balance_formatter(amount, asset_id, client):
    """
    Returns the formatted units for a given asset and amount.
    """
    asset_info = client.asset_info(asset_id)
    decimals = asset_info['params'].get("decimals")
    unit = asset_info['params'].get("unit-name")
    formatted_amount = amount/10**decimals
    return "{} {}".format(formatted_amount, unit)
Next, create a check_holdings function in main.py and import the balance_formatter function we just created.
main.py
from util import balance_formatter

def check_holdings(asset_id, address):
    """
    Checks the asset balance for the specific address and asset id.
    """
    account_info = client.account_info(address)
    assets = account_info.get("assets")
    for asset in assets:
        if asset['asset-id'] == asset_id:
            amount = asset.get("amount")
            print("Account {} has {}.".format(address, balance_formatter(amount, asset_id, client)))
            return
    print("Account {} must opt-in to Asset ID {}.".format(address, asset_id))
This function retrieves the balance of the asset for a particular account. Try it on the account that just opted in.
>>> from config import receiver_address, asset_id
>>> from main import check_holdings
>>> check_holdings(asset_id, receiver_address)
Account GYOVUXBMA5C55BI4YO27WKI4QQIMXJHVXMMCFKEOJMZV6TRJJDJ6V6NTAU has 0.0 Woof.
A balance of 0 Woof confirms that the account is opted in and ready to receive transfers.
Learn More
6. Transfer LaylaCoin to the Receiver Account
Next, let’s have the creator account send 60 Woof to the newly opted in receiver account.
Create a transfer function in main.py to do this. Similar to our other functions, let’s give it an optional passphrase argument to sign and send the transaction right away if a passphrase is supplied.
The transfer_data variable specifies the information that is relevant to a transfer. Most of this data is supplied through config.py, except the amount, which we set to 6000 (i.e. 60 Woof, when we take into account the decimal value).
We construct a transaction object with the AssetTransferTxn class.
main.py
def transfer(passphrase=None):
    """
    Creates an unsigned transfer transaction for the specified asset id, to the
    specified address, for the specified amount.
    """
    amount = 6000
    params = client.suggested_params()
    txn = AssetTransferTxn(sender=creator_address, sp=params, receiver=receiver_address, amt=amount, index=asset_id)
    if passphrase:
        txinfo = sign_and_send(txn, passphrase, client)
        formatted_amount = balance_formatter(amount, asset_id, client)
        print("Transferred {} from {} to {}".format(formatted_amount,
            creator_address, receiver_address))
        print("Transaction ID Confirmation: {}".format(txinfo.get("tx")))
    else:
        write_to_file([txns], "transfer.txn")
Call this function from the REPL.
>>> from config import asset_id, creator_passphrase
>>> from main import transfer
>>> transfer(creator_passphrase)
Confirmed TXID: DJ4URMOZBYYUICEYYQTWPG76YMCA6OK6FCNQ6ILNXK4GC4KOHVIA
Transferred 60.0 Woof from BE5Z4G4LFV56HALV3RG2O3H3TT5DGAKIEX42QVQAI4674IZCXRBE3F7DEE to GYOVUXBMA5C55BI4YO27WKI4QQIMXJHVXMMCFKEOJMZV6TRJJDJ6V6NTAU
Finally, let’s confirm that the receiver_account now has 60 Woof.
>>> from config import creator_address, receiver_address
>>> from main import check_holdings
>>> check_holdings(asset_id, receiver_address)
Account GYOVUXBMA5C55BI4YO27WKI4QQIMXJHVXMMCFKEOJMZV6TRJJDJ6V6NTAU has 60.0 Woof.
The End
Learn More